
Lab Colour Saturation
Everybody says that Colour Saturation in Lab is miles better than doing it in RGB - so lets put it to a really hard test.
Trying to take a picture of a sunset and then printing it is almost impossible because of the brilliance of the sun. A setting sun is a brilliant yellow-orange colour, but when we print it (or view it on the screen) the blank paper is as white as we can go. If we then try and add colours to this it can only get darker and trying to add both colours will make it worse!
Lab with it's complete range of colours, some which are called 'imaginary', can represent that colour because colour and brightness are separated. No such luck with RGB. In a sense this doesn't help if the camera could not capture the brilliant colours in the first place, but I digress.
The only thing to 'improve' this situation is to boost the colours in the hope of fooling the viewer into perceiving a colourful sun.
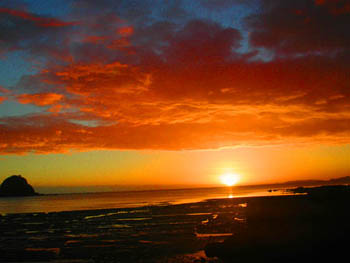
| Here is the out of camera original.
I have not done any adjustments to it. Amazingly the centre of the sun is not blown, pure(?) luck (but then I bracket these sort of shots), and it is rgb 250,252,251 (not that it matters for this experiment) which may indicate a slight colour cast if it wasn't for problems like chromatic aberration with this old camera.
|
 |
||
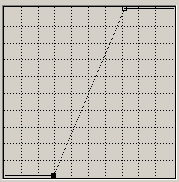
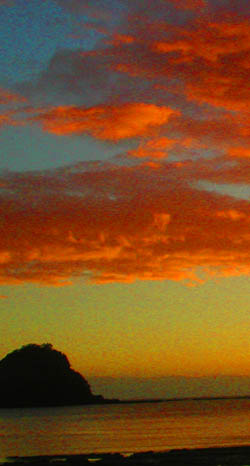
Here I've done a standard LabColourSaturation
Action which 'curves' the a and b channels like this
In all saturations like this, one can sometimes expect problems with noise and if they had occurred we could remove them with a little blurring of the a and b channels - but not necessary here.
|
 |
||
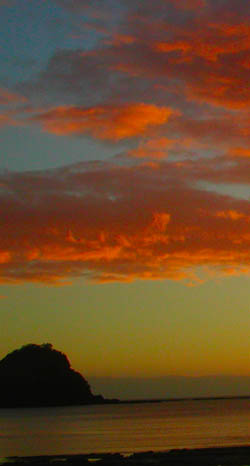
| Here I have saturated it in rgb Image>adjustment>Hue/Saturation
by moving the Master Saturation control to 67%. I was trying to match the Lab saturation
above as near as
possible. Looks okay (as this scale) compared to the trouble of doing it in lab, but the area around the sun is not so good and the abrupt change in the sky colour to it's left. If we compare a 100% crop, then the difference is incredible. |
 |
| RGB | LAB |
 |
 |
This picture exploits Lab's ability to make impossible colours. In RGB the brightest colour is 255,255,255 and any attempt to add colour will darken it. But in Lab, where colour and contrast live in separate channels we can have pure lightness at 100% and still add colour to it! However although Lab can hold these colours, Photoshop must try and make them visible and also convert them back into RGB/CMYK for printing - it just does the best it can with these out of gamut colours. So be slightly aware that when you convert a Lab image into RGB, the colours can change, but you will only notice this when they are wild impossible ones.