This page shows how one can apply Lab Saturation in two moves, in Photoshop, to really give an image some impact in different areas.
With any image, I think it is important to first work out what you want to do with it. In this case I wanted to turn a dull photo into a really colourful one with a lovely deep blue sky.
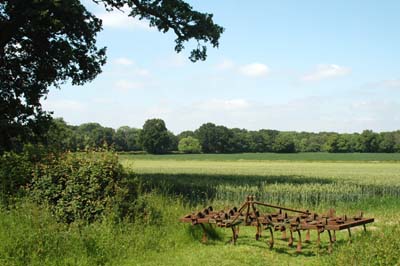
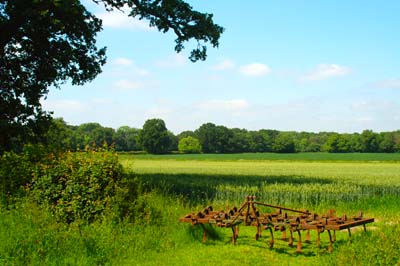
Here is the original image - moderately dull
colours, but with a full tonal range.
I should really apply a bit of contrast, using Curves - but this is about Colour, so we'll skip that step. |
 |
| Here I have just applied my standard LabColourSaturation
Action (which creates a new layer) and then reduced the Opacity to 82% -
quite an improvement for 2 mouse clicks!
Now we need to play with the sky. I need to stay in Lab mode for the second saturation to improve the sky, by darkening it and give it a bit more colour. So I create a second Curve Adjustment layer and played with the L and b channels. |
 |
Here is the L curve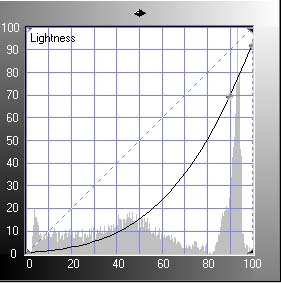 |
and just a touch of blue colour change |
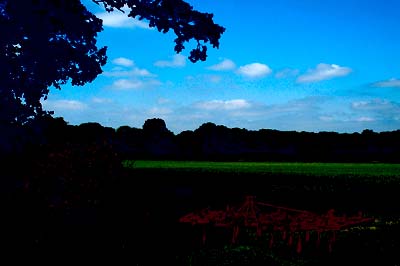
| Now we have a lovely sky, but the rest of the
image is not exactly what we want!
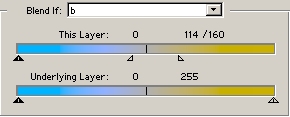
So we need to limit the change to just the sky. One could try creating a Mask, but it is much quicker and simpler using the BlendIF feature for both channel changes. (Double click to the right of the adjustment layer to bring up the Layer Style dialog to get to the BlendIF adjustment at the bottom of the window.) Here is what I did for the two channels... |
 |
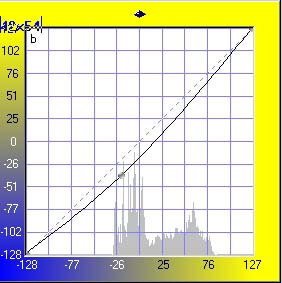
The L channel, protecting the darker areas of
the image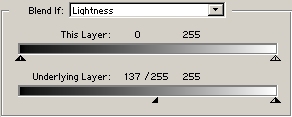 |
and the b channel limiting the colour change |
| I think of the top (This Layer of BlendIF) as a line of bricks that will fall
down on to the layer beneath unless you move the sliders inwards to stop them -
the bottom (underlying layer) as a row of eggs which will get smashed
unless you protect them by moving their sliders inwards. You can mitigate
the effect by splitting the sliders (using the Alt key) to make a smooth
transition. So with 6 sliders (2 per channel) you have a lot of control
over how the top layer will change the image. |
|
| So the final image looks like this...
Note there is a slight difference in the sky between the previous image and this one because of the BlendIF changes. I think the change is quite dramatic for such little effort - something like a dozen mouse clicks! I hope this gives you ideas about how easy it is to make changes in Lab colour mode and the power of BlendIF. |
 |