
Hopefully we have got the general idea of using Channels - now comes the real payoff by using the information in a Channel and combining it with Layers to get a quick easy way of Sky Darkening/Enhancing.
I hope the following description will begin to open your eyes to the power of channels, layers and blending modes, so lets take it very slowly, step by step!
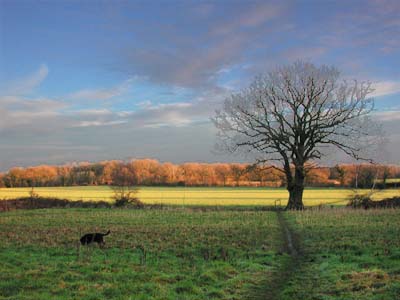
Here is an uninspiring photo I took (straight out of the camera) when I thought of the idea of sharing this technique with you.
 |
 |
| Original image | Blue channel |
| Now if we invert the blue channel, we would get this.
Imagine this grey image as a dodge and burn layer placed over the original
image. The dark areas would make the image darker and visa-versa.
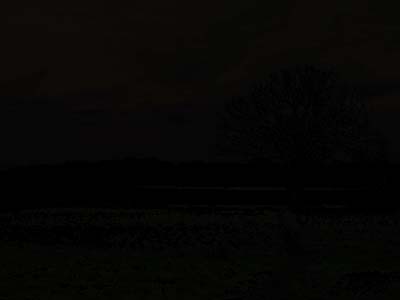
So we could put this inverted Blue channel on a new layer and change the blend mode to Soft Light or even Overlay (for more effect) to darken the sky - forget about the rest of the image for a moment. You could literally do the above steps, as it is exactly (well almost) the same as using Apply Image, on a duplicated layer, and selecting the Blue channel, Inverted, as the source. |
|
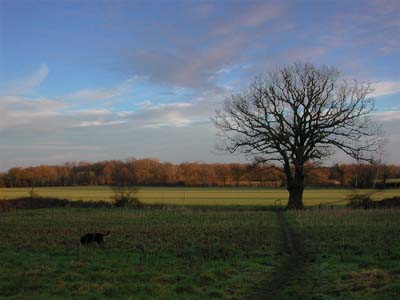
| Well the sky has become quite nice and dark, and we could
always reduce the Opacity of the layer to lessen the effect. But
what about all the other changes we did not want? - sort of surreal.
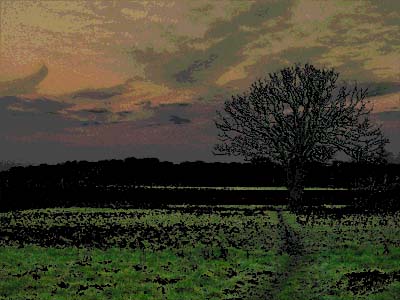
There is a simple answer - add a top layer, as a duplicate of the original image, and set the blend mode to Darken... |
|
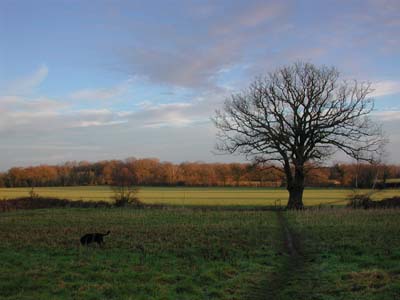
| Wow - we've got the rest of the image back to what it was,
but with a darkened blue sky. Magic?!
It is all in the 'blends' you know - one needs to understand, and visualise, what a blend will do for you. The Darken blend, says don't let anything become lighten (always take the darkest pixels of the two layers), so it chooses the original levels for everything, except the sky which we have just darkened! Clever stuff. There is a little bonus left in this technique. |
|
| These are the Layers we wind up with (if you use by action)
|
|

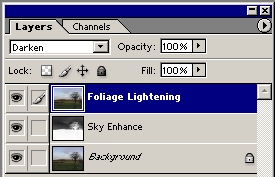
In fact this technique is so good I've made it into this Action (needs my standard actions to work) with an optional Guassian blur - needs to be small or you will get halos.
The above is different to the Improve Weak Sky action (Dan's one on my action page). So just to finish off Channels and the sky, lets see how Dan's method works.
| He uses the Red channel (shown opposite), which is normally weak (i.e. dark) in a blue sky, and he then does an Apply Image with a Darken blend on a new layer. | 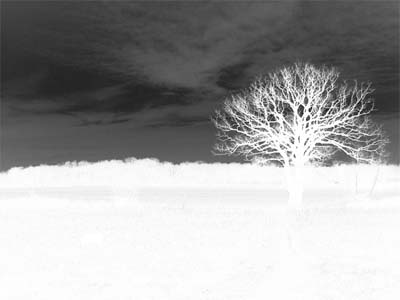 |
| And sets the blend mode to Luminosity for that new layer. |  |
| So there we are - two different approaches. You
could adapt these methods to suit particular images - you may have noticed
that (for this image) the inverted Blue channel is very similar to the Red
channel, so channel inspection is worth doing before deciding what to do.
In fact comparing the two methods on this image, we need the Opacity of about 10% on the Blue channel blending to be the same as 100% of the Red channel. For more saturated skies you may find that the Red channel gives more punch! Just to show you, the left image is the 'normal' difference (using my SeeChanges action) between the equivalent levels of the two methods, and the one on the right is exaggerated a huge huge amount - so at equal enhancements they are virtually the same (for this image!). |
|
 |
 |
Can't see anything in the left image? - drag it into Photoshop, then you should just be able to make out the tree!
So with Actions you can just try and see - or you could look at the image and 'see' which one will be best and spot other adjustments you could make with Channels to get a head start when post-processing. Do remember to inspect for 'damage' to other parts of the image when you use either of these methods and (ugh) you may need to mask out the damage.
Isn't it fun to be able to make changes to images without having to make any selections or masks.