|

| |
This page summaries my research into how to use the Zone System,
especially in digital photography. I never used the system in the old days as I did very
little darkroom printing, but I thought I understood the idea - but not
enough...The Original Film Zone System
Zone descriptions. (Adapted from Adams 2002, p. 52-60) - Film and Paper.
| Spot |
Zone |
Description |
| |
0 |
Total black. Complete lack of density,other than dark current noise.
Should appear as total black in the print. |
|
I |
Near black, no detail. Effective threshold. First step above
complete black in the print.
Slight tonality, but no texture. |
|
II |
First suggestion of texture. Very dark details in shadows.
Deep tonalities, representing the darkest part of the image in which
some slight detail is required. |
| Shadow |
III |
Very dark grey. Dark textured bark on shadow side of tree. Average
dark materials.
Good texture and detail can be seen.
This is where you will want to place shadow details. |
| |
IV |
Medium-dark grey. Average dark green foliage, shadow side of skin,
dark stone, landscape shadow. Details plainly visible. This where you
want to place the shadow side of Caucasian portraits in sunlight. |
| Average |
V |
Middle grey. Standard Kodak 18 % grey reflectance card. Clear
northern sky, dark skin, grey stone, average weathered wood.
Excellent detail visible. |
| |
VI |
Rich mid-tone grey. Caucasian skin in sunlight, light stone and
sand, shadows in snow in brightly sunlit snowscapes. Sharp fine detail
visible. |
| Highlight |
VII |
Off white or bright light grey. White with texture, very light skin,
silver hair, weathered white paint, snow with acute side lighting.
Highest Zone that will still hold good details. |
| |
VIII |
Almost white (not blank whites). Textured snow in sun, reflected
highlights on Caucasian skin. Delicate texture and some gradation exist,
but no detail. |
|
IX |
Nearly pure white without texture (must be compared to pure white to
tell difference). Glaring white surfaces, snow in flat sunlight.
No detail or significant texture visible. |
| X |
Pure white. Specular highlights, glares or light sources in the
picture area. Rendered as the maximum white value of the paper surface |
There is general confusion in books and on the web about whether Zones represent
f-Stops or not.
Nearly everybody says... Zones are one-stop changes in exposure
As Russell Cottrell in
Beyond the Digital Zone System (which also contains a lot of useful
information on the D700) says
If one meters a subject and then increases the exposure by one
stop, we call this placing the subject on zone VI.
But, for instance, Gisle Hannemyr in
Adapting the Zone System to Digital Photography states...
Many texts on the zone system claims that the difference between
adjacent zones are 1 EV (1 f-stop). This is not true.
EVs and f-stops express relative difference in levels of light present in
a scene.
Zones express relative difference in levels of density present in a
photographic print, which may or may not reproduce exactly the relative
levels of the original scene.
And Chuck Gardner in his
The Adams
Zone System and Digital Photography says...
The Zones = f/stop confusion stems from the fact Adams' baseline
"normal" sunlit scene measures 10 f/stops and his baseline #2 print paper
needed a 3.0 density range (i.e. 10 stop equivalent) negative range.
Zone Concepts
So we need to make sure we understand the concepts before seeing how the
system applies to digital photography - to take a few quotes...
All aspects of the system are based on the artistic premise that the
photographer should make some decision about how the photograph should
look before the film is exposed. In other words, Pre-Visualisation
means imagining the final print before the film is exposed and
deciding how we want it to look.
The Zone System is based on the principle that the correct exposure is
a matter of personal, creative expectations and that a light meter is a
tool to use for information.
We should distinguish between print values and negative film values
because the print value is a literal grey tone while any area of the
negative can be printed in any tone by changing the exposure time given to
the print. The negative film values are relative to each other and
the print values are absolute. Remember that the zones in Adams'
system are tonal values on the print, not in the scene.
When we talk about a tree being in zone V, we mean that it is either
zone value V on the print or we have exposed the film with the intention
of making it zone V.
Changes in development from normal alter the zone relationships and the
progression of zones is no longer considered normal.
When the film is developed for more than the normal time we
get more than a one zone change for every f-stop difference that
we measure.
|
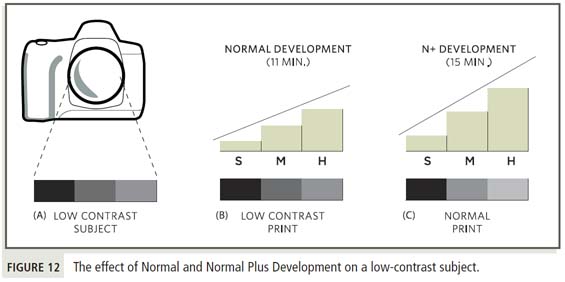 |
Less than normal development results in less than a one zone
change for each measure f-stop difference.
|
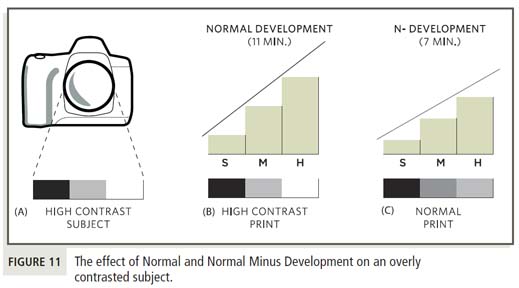 |
The above points were the foundation of the
process as film development time
changes the dynamic range of the negative (moving zones apart or closer)
- something we can not really do with digital 'negatives'. This zone
'moving' made the rest of the system work for B&W prints.
|
A point to remember
In the old days the post-processing was really done
blind compared to today's facilities. One had to get the exposure
right, so that everything else could be controlled.
It still applies today that if the exposure does not
capture the detail you want, no amount of post-processing can get it
back. The worse case being clipped highlights - once they are
blown, they are blown!
A bit of detail (no pun intended!)
Talking about 'detail' is not the same as 'seeing', so I've taken following images
(and the ones above) from "The
Practical Zone System for Film and Digital photography" by Chris
Johnson, which is free to download from the web and well worth the read.
I also read "The Zone System Craft Book" by John Woods and some of the
quotes are from him - it is a good 'film' perspective read.

Zone I |

Zone II |

Zone III |
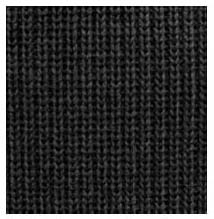
Zone IV |
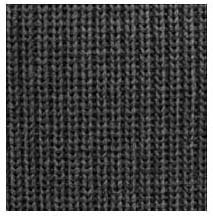
Zone V |

Zone VI |
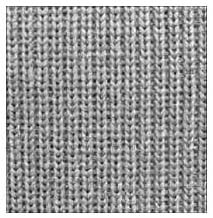
Zone VII |
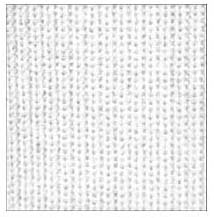
Zone VIII |

Zone IX |
The Important Zones
We usually meter to place one of the zones III, V and VII. I
feel that it is the texture detail in zones III and/or VII that are the most
important areas to decide to capture. It is not always obvious (to
me) which are the important areas in a scene and I must 'confess' to
sometimes finding 'eye-homing' areas when post-processing that I was not
aware of when I took the photo. In the film days the 'rule' was
Expose for the shadows, develop for the highlights
In the digital world, beset by clipping problems (especially
highlights), the 'rule' now becomes
Expose for the highlights, process for the shadows
By making test exposures we can formulate rules to ensure that on
metering, say Highlights, we can correctly expose the image to capture
as much detail as possible by dialling in some compensation - an
alternative is to check for clipping highlights, on the camera screen, after taking a shot, but
beware this is not foolproof and does not relate to detail present in
raw capture. |
|
|